Hey guys! Yeah, I know!! I am so freakin' behind on posts its ridiculous. Part of the problem is that my computer doesn't reliably get internet access, which I don't understand. I talked to my (IT) husband, but I don't think he knows either and it's kind of difficult posting on an iPad or iPhone!! I have been working on my shirtwaist dress but I will post about that later.
So, the other day I got an email from....well....to make a long story short, a friend, and she was asking me to help her make M6349. I played good blogger and advised against it!! :P Anyways, after a couple
novels emails later, we decided on Simplicity 2444. I was going to send her a list of things she would need, then that turned to "maybe I should send pictures?", then that turned to "I should put it on my blog so I could help her and whomever else needs the help". (Yes, I am one of
those people who still use the word "whom") So, the Beginner Series was born (button to come!).
This series is going to be a little different then my Shirtwaist Dress sew a long. I wanted to put up posts slowly. Especially considering my Shirtwaist Dress sew a long STILL isn't finished :P So, this first post is just a list of supplies that a beginner would need. Also, post here or email me if you have any questions (even if this post is like 20 years old).
Are you ready?
1. Sewing Machine:
There are some projects out there that could be done with hand sewing and I suppose this is one of them. I mean technically anything can be done with hand sewing. For the sake of this series, we are going to use a sewing machine. Any machine will do, as long as it sews straight and zig zag.
2. Needles:

You will need hand needles and machine needles. While we will be using the machine, there are a couple spots on this dress that need some hand sewing.
For your machine needles, get a universal pack with a bunch of different sizes (it does not have to be Schmetz brand. Get the right brand for your machine). Make sure that you don't get "ball point" needles-those are for knit fabrics and we will not be dealing with those today.
3. Measuring tape:
Do NOT go by your RTW (ready to wear) size for this. Just because you wear a size 8 dress, does NOT mean you wear size 8 pattern size! I will go over measuring in a later post.
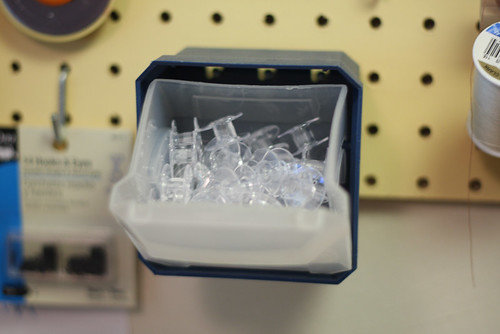
4. Pins/pin cushion:
Yeah, I have a boring tomato pin cushion. I have plans to one day make a prettier one, but in the meantime, this does it's job. Annnd, yes, my pins are organized by color and it looks like my tomato has some awful venereal disease, and this is not optional, I just like it like this. Also, you want to get some pins that don't have a colored head. They should be pretty easy to find. These make marking your fabric infinitely easier (in my opinion.
5. Basting tape:
Try looking in the apparel sewing notions area. If you can't find it, check out the quilting area. I use this tape for applying zippers. You can buy it on Amazon
here. The most important thing about this is that the package says you can sew through it. Some tape you can't sew through and it will mess your needle up. Don't buy that stuff...trust me...it's not fun.
6. Bobbins:
I went on Amazon and bought like 50 of these suckers. I know some machines come with like 3 bobbins or something. Which is great for this project, but you may want to look into purchasing a package or two. Or bulk buy them on amazon and never run out of bobbins again :)
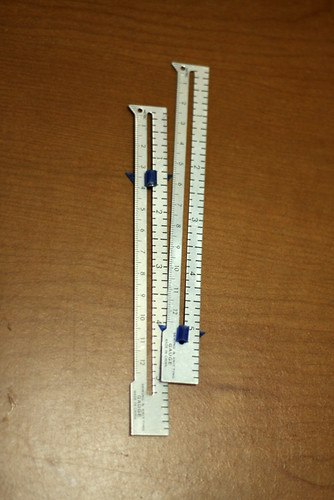
7. Seam Gauge:
Yes, I have two of them. You obviously don't need two right now, so just buy one. However, later, you may want to pick an extra one up.
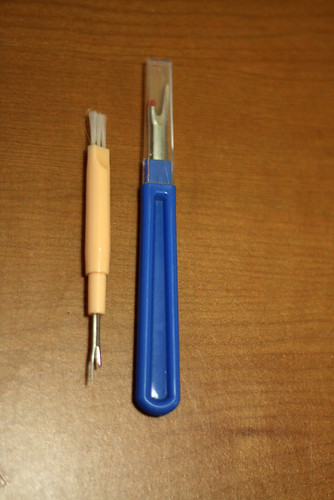
8. Seam Ripper:
Meet your new best friend! Let me just tell you that you WILL need to seam rip. It's like that children's book, Everyone Seam Rips. What? No one has made that book yet? Well, they should.
So, yeah, I have two of these. I got the little one with my machine and if yours came with one, then awesome, you don't need to buy one. I have two for two reasons: A) I have a tendency to lose things. Seriously it's a family joke, my husband will give me something to hold and 30 seconds later it's lost. B) the little one is great for ripping seams (go figure) and making buttonholes (I make mine with an exacto knife now, though) and the big one is great for taking out basting stitches. Again, you don't need two, but you definitely need at least one!
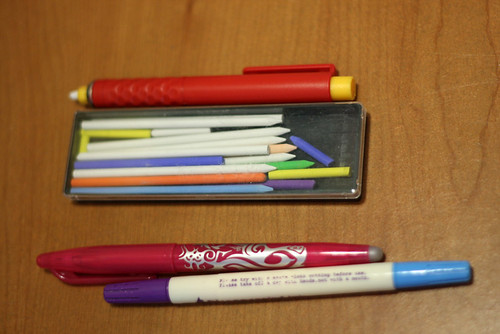
9. Marking Utensils:
Okay, in the beginning you can buy these on a "per project" basis. Marking pens is really a personal question. I had to go through many, many duds that other sewers swore by before I cam up with my arsenal. For dark fabrics I use
this chalk system. Its great for dark fabrics, but honestly, you have to keep them really sharp for them to be super accurate and sharpening wastes chalk. For lightweight fabrics I use
these heat sensitive pens. These are awesome!! However, on some fabrics, even after I iron over the marks, there is a light discoloration. So, for those fabrics, I use a fabric marker (sorry, can't find it on amazon). Basically, the purple side disappears after a while. However, after you use the pen for a while, the ink starts disappearing faster and faster. The blue side disappears after you get it wet. However, sometimes it doesn't disappear. Definitely get ALL of you blue marks off your fabric before you iron over it or wash/dry it!! Heat sets it!
So, the most important rule when dealing with marking utensils is to test your fabric!! Always test on a scrap piece before actually marking your garment!
9. Clear Ruler:
Honestly, you can pick this up in an office supply store, I am pretty sure. You can get away with a normal wooden/plastic ruler, but eventually you will want to get a clear one. I use these for tracing and for marking darts/pleats on fabric and this dress has both! So some form of ruler is a must!
10. Tracing paper:
Yep! I am going to make you guys trace! Why? Because I am sadistic! Ok honestly, tracing seems tedious and it's not. I started out tracing using tracing wheels (see above...check out the vintage one! Looks like a spur! I got that one from Devin's Aunt :D She also wanted to know if I wanted a bunch of "old-I-almost-threw-them-away" patterns. Ummmmm yes!!) and extra Christmas paper. If you knew my mom, you would know that there has always been copious amounts of christmas paper and she keeps giving me new, unopened christmas paper from when I was a kid. So, yeah, that was a cheap way for me to start out. There is also tracing paper/pattern paper at Joanns. You can usually find them by the interfacings. Another option is
what I am using now. However, you may want to see if you like tracing before buying a full box. It's pretty awesome. It's light enough to see through, sturdy enough to draw/write on.
One this I would NOT recommend is tissue paper. It's too weak and flimsy and it will fall apart when you try to write on it.
11. Scissors:
You need TWO pairs. One normal pair (that you probably already have at home!) for cutting paper and thread. You need another pair for just cutting fabric, and fabric ONLY! When you cut paper, it dulls your blade very quickly, if you continually use scissors to cut thread, it can cause a little indent where you usually snip and that can affect your cutting. I have a pair of ginghers (the pretty pair sitting by itself) and those can be expensive. You don't need to buy that right now, just buy a pair of fiskers and take a sharpie and write "fabric" on the blades...then hide the scissors for dear life! For some reason non-sewing people are very attracted to fabric scissors and try to use them for EVERYTHING (I'm looking at you Devin!). If you have the money, then great! Buy the ginghers. Actually, out of everything on this list, a nice pair of scissors and a nice sewing machine are probably the best things to splurge on.
Oh, and by the way, I have a lot of scissors because we are a very creative family of three. We actually do need all these scissors. I need to throw out the red ones, though. They are super dull and are super tight.

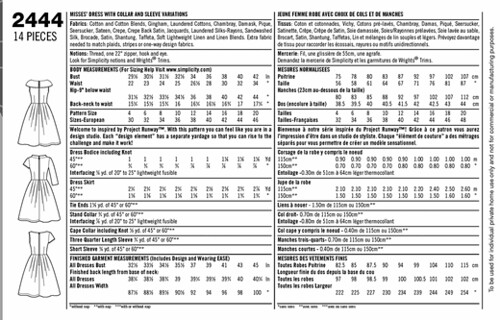
12. Pattern:
You need a sewing pattern, of course. For this particular series, I am using Simplicity 2444. Do yourself a favor and don't spend tons of money on patterns (unless they're indie patterns!!). Go to sewingpatterns.com and as of right this second, Simplicity patterns are $5.99 plus shipping. If you have a Joanns near you, check out their sales. They routinely have pattern sales where Simplicity, Mccalls, and Butterick are only $1 a piece. So, yeah.
13. Thread:
When you go to the store and buy your fabric, pick out thread to match it. To be 100% honest with you guys, I am horrible at this. Devin and Kayleigh are much better, so I usually bring them to the store when I do this. :) Then, after a bunch of projects, you will have a thread collection like mine! I used to buy coats and clark because my Singer liked that thread. However, with my Janome, Gutterman thread works a lot better. (On an unrelated note, everything about this picture just makes me happy :) )
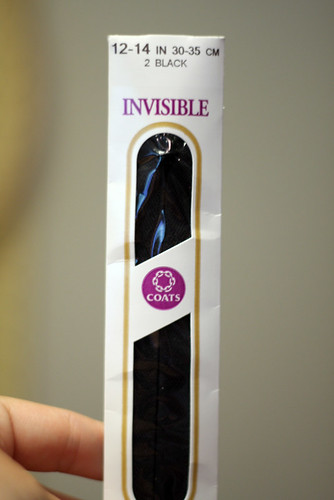
14. Zipper:
This is not the zipper I will be using for this project. I wanted to take picture of the zipper package. Get a 22" INVISIBLE zipper. Why? Well, I refuse to sew any other zipper. Invisibles look better and are easier to put in. If your machine has an invisible zipper foot, great. If it doesn't then you can use your normal zipper foot to put this in. I will show you how, because I do not have an invisible zipper foot and I am very slapdash with how I put in my zippers, so sorry guys!
15: Bias Tape:
ONLY get this if you are planning on doing the sleeveless version of this dress. I am not going to do the facings for the armholes because I have always found those annoying. Make sure you are getting single fold bias tape.
16: Seam Binding or Twill Tape:
If you can find it in packaging like this great. This is a vintage notion I picked up at a sewing store for 50 cents. If you can't find it, then you can buy "twill tape". Honestly, it's practically the same thing. The twill tape looks just like the bias tape package, but says twill tape. Or, you
can buy some online. Sunni from A fashionable Stitch has a great store, which now that I look at it, she has the basting tape and the medical exam paper!
Definitely buy from her! There are a lot more colors of seam binding in her shop and you would be supporting a fellow sewing blogger :)
If you can't find anything you like, buy extra bias tape (see above!)
17: Fabric:
Ahhh yes, probably the most important thing you need. So, look on the back of the pattern and it has how much fabric you would need. It gets really confusing because of all of the different pieces. Don't let that scare you! You should be safe with 3 1/2 yards of 60" wide fabric and 4 yards of 45" fabric. I usually overbuy fabric and use extras for muslins. If you want to do the tie ends, add 1.5 yards of fabric, because they are cut on the bias.
That's not all the fabric you need! You will need about 1-1.5 yards of fabric for a muslin that we are going to make. You can use old sheets that you don't use any more, you can use $1 a yard fabric from wal mart, you can use pretty much anything that you're not afraid of messing up. I am not going to delve too far into fitting for a beginners sewing series, but you need to at least know if your pattern is going to fit!
18. Interfacing:
You will either need to look around for this section OR ask an associate where the interfacing is. If you're in a craft/sewing store you can ask what weight of interfacing you need for the fabric you're buying and they can help you. However, interfacing is just something that you need to learn. First of all, don't buy knit interfacing, we aren't using knit fabric for this. You should be okay with buying medium weight fusible interfacing.
You should buy 1/2 yard, but if you are going to make the stand collar get 1 yard.
19. Iron and Ironing Space:
Remember when I said Fabric is the most important thing? Well, if fabric is the most important, an iron is the second most important! You will be amazed at how much you don't actually sew when you are "sewing" most of the time is spent cutting out or.....wait for it....ironing! This should be pretty self explanatory.
Oh and the reason why I said "Ironing Space" is because I don't think you necessarily need an ironing board. As a matter of fact, when I first started sewing, I used a towel draped on the table next to me and just laid my pieces on that and ironed. Then, my lovely Mother-in-Law (sounds sarcastic, but I can assure that she IS lovely and crazy awesome...just saying) got me an ironing board for my birthday!
Anyways, I will post a good resource for measuring (I guess you kinda need that, right? :P) and I will talk about fabric on the next post. I don't think that one will be as long. Besides, this was the dryest part of the whole thing! I hope....
Oh! And to all the advanced sewists out there who have made it this far! Did I miss anything?? Leave a comment and let me know what you think is essential!